


原作者:Andy Jiang;原文发表于 2022 年 10 月 25 日,来源:Deno Blog — How to Build a Blog with Fresh。本文依据授权翻译整理,保留原文的早期 Fresh 工作流,勘误与安全补充另行标出。
Fresh 是面向边缘运行环境的 Web 框架。原文介绍的 Fresh 默认不向客户端发送 JavaScript,也不需要构建步骤;它把速度作为重点,配合 Deno Deploy 的边缘部署,可以让获得良好的 Lighthouse 页面速度评分变得容易。不过,具体评分取决于页面内容、资源和测试条件,不能由框架名称直接保证。本文将用 Markdown 文件构建博客,再介绍原文的部署流程。示例源码位于 denoland/fresh-blog-example。本次核对时该仓库显示已于 2026 年 7 月 30 日归档,因此更适合作为历史学习材料。
一、创建 Fresh 项目
原文使用 Fresh 提供的初始化脚本:
deno run -A -r https://fresh.deno.dev my-fresh-blog在交互问题中,为 Tailwind 和 VSCode 选择 yes。进入生成的项目目录后,运行开发任务:
cd my-fresh-blog
deno task start
原文此时展示 Fresh 默认页面。这里不伪造本次运行截图。编者补充:-A 授予所有权限,-r 会重新加载远程模块;这条命令会执行远端脚本。实际采用时,应先审阅并固定可信脚本与依赖版本,在专用新目录中操作。本文未执行该命令。
二、把目录调整为博客结构
初始化脚本生成的是通用应用。为存放文章,增加 posts 目录:
mkdir posts原文接着删除不需要的 components、islands 和 routes/api:
rm -rf components/ islands/ routes/api编者补充:这是一条递归删除命令,只有在刚生成的示例项目、确认目录里没有需要保留的内容时才适用;不要在已有应用或错误的工作目录照抄。可以逐个检查后手动移走这些目录。Windows PowerShell 也不能把这条 Unix 命令当成通用指令直接使用。
原文给出的顶层结构如下:
my-fresh-blog/
├── .vscode
├── posts
├── routes
├── static
├── deno.json
├── dev.ts
├── fresh.gen.ts
├── import_map.json
├── main.ts
├── README.md
└── twins.config.ts
原文把最后一个文件写作 twins.config.ts;这是原文展示,不应据此把实际脚手架的配置文件改名。具体文件以所选 Fresh 版本生成的目录为准。
三、先写一篇测试文章
在 posts 下创建 first-blog-post.md。开头三条横线之间的 front matter 存放标题、时间和摘要,后面才是 Markdown 正文:
---
title: This is my first blog post!
published_at: 2022-11-04T15:00:00.000Z
snippet: This is an excerpt of my first blog post.
---

Hello, world!
接下来让路由读取这些数据并显示出来。
四、首页先取数据,再渲染文章列表
从 routes/index.tsx 开始。原文建议清空示例内容,重新构建博客首页。先定义每篇文章的数据类型:
interface Post {
  slug: string;
  title: string;
  publishedAt: Date;
  content: string;
  snippet: string;
}
slug 用于 URL,title 是标题,publishedAt 是发布日期,content 保存正文,snippet 是列表里的简短摘录。用 Fresh 的自定义 handler 获取文章数组,再通过 ctx.render() 交给组件:
import { Handlers } from "$fresh/server.ts";

export const handler: Handlers<Post[]> = {
  async GET(_req, ctx) {
    const posts = await getPosts();
    return ctx.render(posts);
  },
};原文先把辅助函数放在同一文件里。getPosts() 遍历 ./posts,从文件名去掉 .md 后得到 slug,批量读取文章,最后按发布时间从新到旧排序:
async function getPosts(): Promise<Post[]> {
  const files = Deno.readDir("./posts");
  const promises = [];
  for await (const file of files) {
    const slug = file.name.replace(".md", "");
    promises.push(getPost(slug));
  }
  const posts = await Promise.all(promises) as Post[];
  posts.sort((a, b) => b.publishedAt.getTime() - a.publishedAt.getTime());
  return posts;
}
getPost() 接受一个 slug,读取对应 Markdown 文件,用标准库的 extract 分离元数据和正文:
import { extract } from "$std/encoding/front_matter.ts";
import { join } from "$std/path/mod.ts";

async function getPost(slug: string): Promise<Post | null> {
  const text = await Deno.readTextFile(join("./posts", `${slug}.md`));
  const { attrs, body } = extract(text);
  return {
    slug,
    title: attrs.title,
    publishedAt: new Date(attrs.published_at),
    content: body,
    snippet: attrs.snippet,
  };
}
现在开始显示首页。每个路由文件要默认导出一个返回组件的函数。下面的 BlogIndexPage 从 props.data 取得 handler 传来的文章数组:
import { PageProps } from "$fresh/server.ts";

export default function BlogIndexPage(props: PageProps<Post[]>) {
  const posts = props.data;
  return (
    <main class="max-w-screen-md px-4 pt-16 mx-auto">
      <h1 class="text-5xl font-bold">Blog</h1>
      <div class="mt-8">
        {posts.map((post) => <PostCard post={post} />)}
      </div>
    </main>
  );
}
每篇文章用一个 PostCard 呈现。它显示标题、格式化日期和摘要,整个卡片链接到对应的 slug:
function PostCard(props: { post: Post }) {
  const { post } = props;
  return (
    <div class="py-8 border(t gray-200)">
      <a class="sm:col-span-2" href={`/${post.slug}`}>
        <h3 class="text(3xl gray-900) font-bold">{post.title}</h3>
        <time class="text-gray-500">
          {new Date(post.publishedAt).toLocaleDateString("en-us", {
            year: "numeric",
            month: "long",
            day: "numeric",
          })}
        </time>
        <div class="mt-4 text-gray-900">{post.snippet}</div>
      </a>
    </div>
  );
}
运行 deno task start 后,按原文步骤便可在本地首页看到文章列表。但此时点击文章尚不能显示完整正文,还需要动态路由。样式中的括号写法属于原教程样式工具的语法,不能假定现代 Tailwind 配置都会识别。
五、增加文章详情路由
把 routes/[name].tsx 改名为 routes/[slug].tsx。方括号代表动态路径参数,在 handler 中可以通过 ctx.params.slug 读取它。
详情页也要读取文章,所以将 Post、getPosts() 和 getPost() 抽到新的 utils/posts.ts,并为外部使用的定义加上 export。目录会新增:
my-fresh-blog/
└── utils
    └── posts.ts
原文建议在 import_map.json 的导入映射里加入 "/": "./" 和 "@/": "./",这样便可以相对项目根目录导入:
import { getPost } from "@/utils/posts.ts";详情页 handler 与首页类似,只读取一篇文章,并在返回 null 时调用 renderNotFound():
import { Handlers } from "$fresh/server.ts";
import { getPost, Post } from "@/utils/posts.ts";

export const handler: Handlers<Post> = {
  async GET(_req, ctx) {
    const post = await getPost(ctx.params.slug);
    if (post === null) return ctx.renderNotFound();
    return ctx.render(post);
  },
};
组件负责显示标题、时间和正文。下列代码补全了原文截断的 import { PageProps }:正确的导入来源应与首页一样是 $fresh/server.ts。其他展示逻辑保持原文阶段的写法:
import { PageProps } from "$fresh/server.ts";

export default function PostPage(props: PageProps<Post>) {
  const post = props.data;
  return (
    <main class="max-w-screen-md px-4 pt-16 mx-auto">
      <h1 class="text-5xl font-bold">{post.title}</h1>
      <time class="text-gray-500">
        {new Date(post.publishedAt).toLocaleDateString("en-us", {
          year: "numeric",
          month: "long",
          day: "numeric",
        })}
      </time>
      <div class="mt-8" dangerouslySetInnerHTML={{ __html: post.content }} />
    </main>
  );
}
原文此时访问 http://localhost:8000 并点击文章,可以看到正文。然而,此阶段只是把正文字符串直接插入 HTML,还没有把 Markdown 语法转换成 HTML。写上 Markdown 标题、列表等语法时,显示效果并不正确。
在现有函数基础上,至少应作以下修订:只接受限定格式的 slug,读取不到文件时仅处理 Deno.errors.NotFound,其他错误继续抛出;遍历时只选择普通 Markdown 文件。示例修订片段如下,需合入函数内部,并为元数据增加类型与日期检查:
// 编者修订:放在 getPost() 开头;这是片段,不是完整函数。
if (!/^[a-z0-9]+(?:-[a-z0-9]+)*$/.test(slug)) return null;
let text: string;
try {
  text = await Deno.readTextFile(join("./posts", `${slug}.md`));
} catch (error) {
  if (error instanceof Deno.errors.NotFound) return null;
  throw error;
}

// 编者修订:放在 getPosts() 的目录循环内。
if (!file.isFile || !file.name.endsWith(".md")) continue;
const slug = file.name.slice(0, -3);
上述 slug 规则仅接受小写字母、数字和连字符,适合本教程的文件名;如果需要中文 slug,应重新制定编码与目录边界规则,不能直接放宽为任意路径。读取结果需要筛掉 null 后再排序,日期也要用 Number.isNaN(publishedAt.getTime()) 等方式检查有效性。
六、真正解析 Markdown
原文使用 gfm 模块,将 post.content 交给 render()。先在 import_map.json 的导入映射中加入:
"$gfm": "https://deno.land/x/gfm@0.1.26/mod.ts"接着在 routes/[slug].tsx 导入 CSS、render 和 Fresh 的 Head:
import { CSS, render } from "$gfm";
import { Head } from "$fresh/runtime.ts";
原文的更新片段省略了标题和日期区域。为清楚展示拼接位置,下面将原有组件与这个片段合并,保留相同的渲染方法:
export default function PostPage(props: PageProps<Post>) {
  const post = props.data;
  return (
    <>
      <Head>
        <style dangerouslySetInnerHTML={{ __html: CSS }} />
      </Head>
      <main class="max-w-screen-md px-4 pt-16 mx-auto">
        <h1 class="text-5xl font-bold">{post.title}</h1>
        <time class="text-gray-500">
          {new Date(post.publishedAt).toLocaleDateString("en-us", {
            year: "numeric", month: "long", day: "numeric",
          })}
        </time>
        <div class="mt-8 markdown-body"
          dangerouslySetInnerHTML={{ __html: render(post.content) }} />
      </main>
    </>
  );
}
markdown-body 类名不可少,因为 gfm 样式表通过它作用于正文。经过 render() 转换,Markdown 标题、段落和列表等才能呈现相应格式。
HTML 安全边界:dangerouslySetInnerHTML 是直接插入 HTML 的入口,不会替你把输出转义。原教程的前提是由站点作者管理的可信 Markdown 文件;不要把访客投稿、评论或任意上传的 Markdown 原样送入这条路径。采用任何 Markdown 库时,都需要核对所锁定版本的 HTML 清理行为,必要时增加经过验证的消毒与内容安全策略。本文没有审计 gfm@0.1.26 的全部安全行为,也不宣称此片段可以安全渲染所有不可信输入。
七、按原文流程部署到边缘
原文将 Deno Deploy 描述为分布于全球的 V8 isolate 云环境,可托管 JavaScript、无服务器函数以及网站和应用。它给出的部署流程如下:
- 为博客创建 GitHub 仓库并推送项目。
- 打开 Deno Deploy 控制台,连接 GitHub。
- 选择 GitHub 用户或组织、仓库与分支。
- 选择
Automatic部署模式,并将main.ts设为入口。 - 点击
Link开始部署;完成后取得可访问的 URL。
这些是 2022 年的控制台选项,当前产品的项目配置、构建与入口要求应按当前官方文档核对。本文未连接账户、创建仓库、部署站点或验证原示例站点仍在线。生产环境还要确认 Markdown 文件会包含在部署产物中,并确认工作目录与读取路径一致。
八、这个博客练习学到了什么
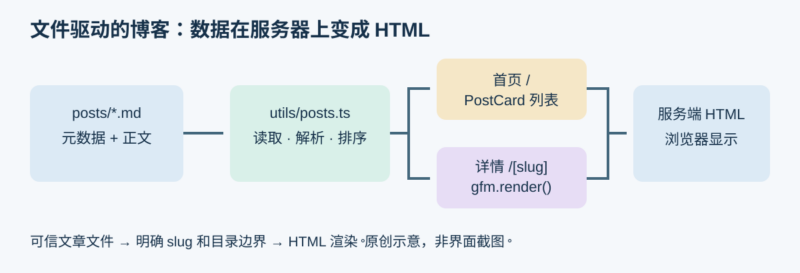
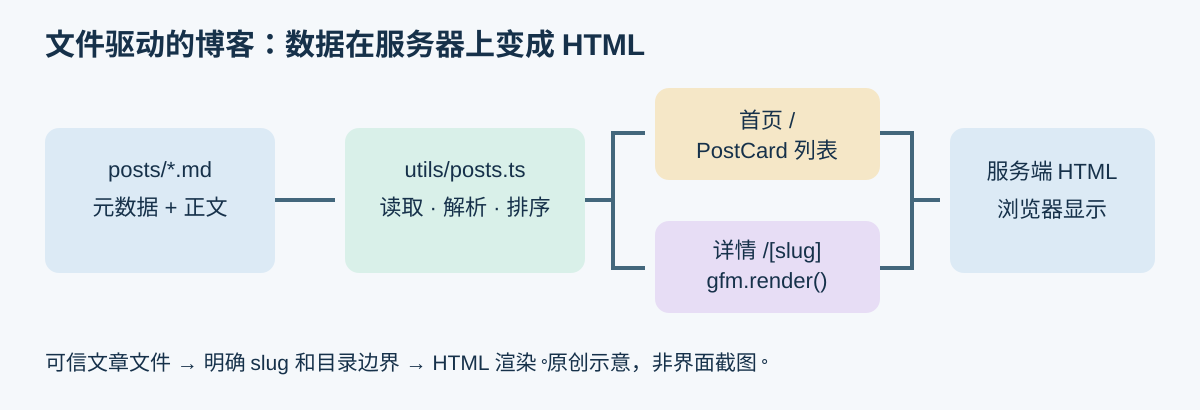
本教程展示了 Fresh 怎样在服务器上从文件系统读取数据,形成文章对象,再把首页和正文渲染为 HTML。进一步学习可参考原文链接的视频:Luca 从头创建博客并部署到 Deno Deploy(本次仅保留原文引用,未读取视频内容)。遇到 Fresh 或 Deno 的问题,也可以到原文所列的 Discord 和社区渠道交流。
原文网页版权归 Deno Land Inc.;已核对示例仓库采用 MIT License,Copyright 2018-2022 the Deno authors,许可全文保留于下方。原创示意图、版本边界和静态审核注释由未完纪编辑整理。
示例仓库 MIT 许可证(原文保留)
来源:fresh-blog-example/LICENSE。该许可针对示例仓库,不自动替代 Deno Blog 网页授权。
MIT License

Copyright 2018-2022 the Deno authors

Permission is hereby granted, free of charge, to any person obtaining a copy of
this software and associated documentation files (the "Software"), to deal in
the Software without restriction, including without limitation the rights to
use, copy, modify, merge, publish, distribute, sublicense, and/or sell copies of
the Software, and to permit persons to whom the Software is furnished to do so,
subject to the following conditions:

The above copyright notice and this permission notice shall be included in all
copies or substantial portions of the Software.

THE SOFTWARE IS PROVIDED "AS IS", WITHOUT WARRANTY OF ANY KIND, EXPRESS OR
IMPLIED, INCLUDING BUT NOT LIMITED TO THE WARRANTIES OF MERCHANTABILITY, FITNESS
FOR A PARTICULAR PURPOSE AND NONINFRINGEMENT. IN NO EVENT SHALL THE AUTHORS OR
COPYRIGHT HOLDERS BE LIABLE FOR ANY CLAIM, DAMAGES OR OTHER LIABILITY, WHETHER
IN AN ACTION OF CONTRACT, TORT OR OTHERWISE, ARISING FROM, OUT OF OR IN
CONNECTION WITH THE SOFTWARE OR THE USE OR OTHER DEALINGS IN THE SOFTWARE.










暂无评论内容