


使用 Stable Diffusion 进行图像插值

本 Notebook 演示如何使用 Stable Diffusion 在图像之间插值:借助基于扩散的生成模型,生成一系列中间图像,使画面从一幅图像平滑过渡到另一幅图像。
以下是一些应用场景:
- 数据增强:在已有数据点之间生成合成图像,扩充机器学习训练集,帮助改善图像生成、分类或目标检测等任务中的泛化能力与鲁棒性。
- 产品设计与原型:生成带有细微差别的设计或原型变体,用于探索方案、开展用户研究,或在制作实体原型之前展示设计迭代。
- 媒体制作:在电影或视频制作中,生成关键帧之间的中间帧,使过渡更平滑、增强视觉叙事,并减少逐帧手工编辑所需的时间和资源。
图像插值通常涉及在高维潜空间中移动。模型在训练中学到的特征由潜空间表示;在不同潜表示之间插值,模型就能生成从起点到终点平滑变化的图像序列。Stable Diffusion 中可以区分提示词潜表示和图像潜变量。
潜空间漫步沿着由两个或多个点定义的路径移动。通过选择这些点和它们之间的路径,可以控制生成图像的风格、内容等视觉特征。
本 Notebook 将展示图像插值示例,以及如何实现潜空间漫步来生成平滑过渡。代码与可视化共同说明生成模型如何以有意义的方式改变图像表示。
首先安装所需模块:
!pip install -q diffusers transformers xformers accelerate
!pip install -q numpy scipy ftfy Pillow
导入模块:
import torch
import numpy as np
import os

import time

from PIL import Image
from IPython import display as IPdisplay
from tqdm.auto import tqdm

from diffusers import StableDiffusionPipeline
from diffusers import (
    DDIMScheduler,
    PNDMScheduler,
    LMSDiscreteScheduler,
    DPMSolverMultistepScheduler,
    EulerAncestralDiscreteScheduler,
    EulerDiscreteScheduler,
)
from transformers import logging

logging.set_verbosity_error()
检查 CUDA 是否可用:
print(torch.cuda.is_available())

device = torch.device("cuda") if torch.cuda.is_available() else torch.device("cpu")
下面的设置用于优化启用 CUDA 的 GPU 上的 PyTorch 性能,尤其是混合精度训练或推理场景,可改善速度和内存使用。相关说明见 Diffusers 的半精度与内存高效注意力文档。
torch.backends.cudnn.benchmark = True
torch.backends.cuda.matmul.allow_tf32 = True
模型
这里选择 runwayml/stable-diffusion-v1-5 模型和 LMSDiscreteScheduler 调度器生成图像。虽然 SD 1.5 较早发布,但它速度快、内存需求较低,并且有大量社区微调模型,因此仍受到欢迎。你也可以尝试其他模型和调度器,比较效果。
model_name_or_path = "runwayml/stable-diffusion-v1-5"

scheduler = LMSDiscreteScheduler(
    beta_start=0.00085, beta_end=0.012, beta_schedule="scaled_linear", num_train_timesteps=1000
)


pipe = StableDiffusionPipeline.from_pretrained(
    model_name_or_path,
    scheduler=scheduler,
    torch_dtype=torch.float32,
).to(device)


# Disable image generation progress bar, we'll display our own
pipe.set_progress_bar_config(disable=True)
以下方法用于减少 GPU 显存占用。如果显存充足,可以跳过这个单元格。
更详细的内容请参阅 Diffusers 的优化概览与内存优化文档;原文相关链接列出了这些方法的说明。
# Offloading the weights to the CPU and only loading them on the GPU can reduce memory consumption to less than 3GB.
pipe.enable_model_cpu_offload()

# Tighter ordering of memory tensors.
pipe.unet.to(memory_format=torch.channels_last)

# Decoding large batches of images with limited VRAM or batches with 32 images or more by decoding the batches of latents one image at a time.
pipe.enable_vae_slicing()

# Splitting the image into overlapping tiles, decoding the tiles, and then blending the outputs together to compose the final image.
pipe.enable_vae_tiling()

# Using Flash Attention; If you have PyTorch >= 2.0 installed, you should not expect a speed-up for inference when enabling xformers.
pipe.enable_xformers_memory_efficient_attention()
display_images 将图像数组列表转换为 GIF,保存到指定路径,并返回供 Notebook 显示的 GIF 对象。文件名使用当前时间,发生异常时打印错误信息。
def display_images(images, save_path):
    try:
        # Convert each image in the 'images' list from an array to an Image object.
        images = [Image.fromarray(np.array(image[0], dtype=np.uint8)) for image in images]

        # Generate a file name based on the current time, replacing colons with hyphens
        # to ensure the filename is valid for file systems that don't allow colons.
        filename = time.strftime("%H:%M:%S", time.localtime()).replace(":", "-")
        # Save the first image in the list as a GIF file at the 'save_path' location.
        # The rest of the images in the list are added as subsequent frames to the GIF.
        # The GIF will play each frame for 100 milliseconds and will loop indefinitely.
        images[0].save(
            f"{save_path}/{filename}.gif",
            save_all=True,
            append_images=images[1:],
            duration=100,
            loop=0,
        )
    except Exception as e:
        # If there is an error during the process, print the exception message.
        print(e)

    # Return the saved GIF as an IPython display object so it can be displayed in a notebook.
    return IPdisplay.Image(f"{save_path}/{filename}.gif")
生成参数
seed:指定随机种子,以支持复现。generator:提供种子时,使用 PyTorch 随机数生成器对象;否则设为None。使用它的操作可以获得可复现的随机结果。guidance_scale:控制文生图过程中遵循提示词的程度;数值越高,通常越强调提示词。num_inference_steps:生成图像的推理步数。更多步数可能改善画质,但也会增加耗时。num_interpolation_steps:潜空间两点间的插值步数,影响动画过渡的平滑程度。height:生成图像的高度,单位为像素。width:生成图像的宽度,单位为像素。save_path:保存生成 GIF 的文件系统路径。
# The seed is set to "None", because we want different results each time we run the generation.
seed = None

if seed is not None:
    generator = torch.manual_seed(seed)
else:
    generator = None

# The guidance scale is set to its normal range (7 - 10).
guidance_scale = 8

# The number of inference steps was chosen empirically to generate an acceptable picture within an acceptable time.
num_inference_steps = 15

# The higher you set this value, the smoother the interpolations will be. However, the generation time will increase. This value was chosen empirically.
num_interpolation_steps = 30

# I would not recommend less than 512 on either dimension. This is because this model was trained on 512x512 image resolution.
height = 512
width = 512

# The path where the generated GIFs will be saved
save_path = "/output"

if not os.path.exists(save_path):
    os.makedirs(save_path)
示例 1:提示词插值
第一个示例从正向和负向提示词嵌入出发,逐步给原始嵌入添加缩放后的增量,生成一系列新嵌入,用于生成平滑变化的图像。代码具体采用的是同时平移两组嵌入的方式,从原始提示词状态出发探索附近的表示。
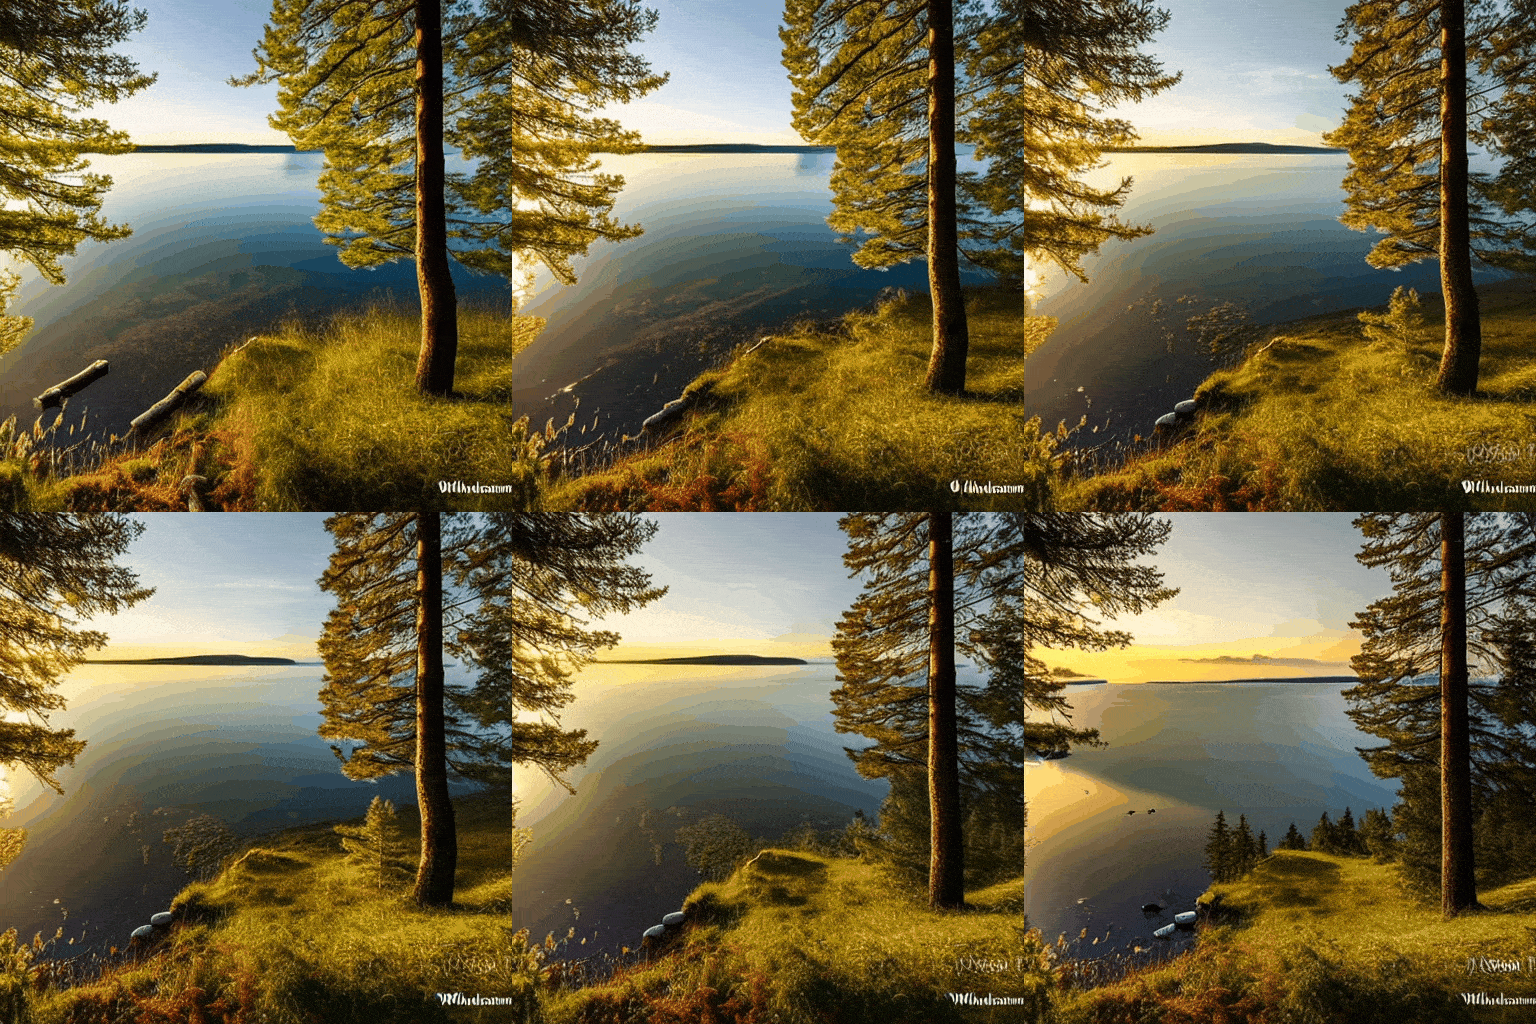
首先对正向和负向提示词分词并编码。正向提示词引导模型生成期望的特征,负向提示词引导它避开不希望出现的特征。
# The text prompt that describes the desired output image.
prompt = "Epic shot of Sweden, ultra detailed lake with an ren dear, nostalgic vintage, ultra cozy and inviting, wonderful light atmosphere, fairy, little photorealistic, digital painting, sharp focus, ultra cozy and inviting, wish to be there. very detailed, arty, should rank high on youtube for a dream trip."
# A negative prompt that can be used to steer the generation away from certain features; here, it is empty.
negative_prompt = "poorly drawn,cartoon, 2d, disfigured, bad art, deformed, poorly drawn, extra limbs, close up, b&w, weird colors, blurry"

# The step size for the interpolation in the latent space.
step_size = 0.001

# Tokenizing and encoding the prompt into embeddings.
prompt_tokens = pipe.tokenizer(
    prompt,
    padding="max_length",
    max_length=pipe.tokenizer.model_max_length,
    truncation=True,
    return_tensors="pt",
)
prompt_embeds = pipe.text_encoder(prompt_tokens.input_ids.to(device))[0]


# Tokenizing and encoding the negative prompt into embeddings.
if negative_prompt is None:
    negative_prompt = [""]

negative_prompt_tokens = pipe.tokenizer(
    negative_prompt,
    padding="max_length",
    max_length=pipe.tokenizer.model_max_length,
    truncation=True,
    return_tensors="pt",
)
negative_prompt_embeds = pipe.text_encoder(negative_prompt_tokens.input_ids.to(device))[0]
下面先从正态分布采样初始潜变量,其形状符合扩散模型 U-Net 的输入要求,也可以传入随机数生成器来支持复现。随后每次迭代都向正向和负向嵌入添加一个逐步增大的小偏移,将结果保存在 walked_embeddings 列表中。
# Generating initial latent vectors from a random normal distribution, with the option to use a generator for reproducibility.
latents = torch.randn(
    (1, pipe.unet.config.in_channels, height // 8, width // 8),
    generator=generator,
)

walked_embeddings = []

# Interpolating between embeddings for the given number of interpolation steps.
for i in range(num_interpolation_steps):
    walked_embeddings.append([prompt_embeds + step_size * i, negative_prompt_embeds + step_size * i])
最后,遍历这些嵌入,按指定的高度、宽度等参数生成图像并收集到列表中。生成完成后,调用 display_images,将图像序列保存为 GIF 并显示。
# Generating images using the interpolated embeddings.
images = []
for latent in tqdm(walked_embeddings):
    images.append(
        pipe(
            height=height,
            width=width,
            num_images_per_prompt=1,
            prompt_embeds=latent[0],
            negative_prompt_embeds=latent[1],
            num_inference_steps=num_inference_steps,
            guidance_scale=guidance_scale,
            generator=generator,
            latents=latents,
        ).images
    )

# Display of saved generated images.
display_images(images, save_path)
示例 2:单个提示词下的扩散潜变量插值
与第一个示例不同,这里在扩散模型的两个初始潜变量之间插值,而不是改变提示词。使用的是 slerp 函数;当然,也可以像前面一样给某个表示添加常量偏移。

下面的函数实现球面线性插值(Spherical Linear Interpolation),即沿球面进行插值。这种方法常用于计算机图形学中的平滑旋转,也可用于机器学习中的高维数据点,例如生成模型的潜向量。
函数参考 Andrej Karpathy 的 gist;其链接及 Slerp 的进一步说明均见原文相关链接。
def slerp(v0, v1, num, t0=0, t1=1):
    v0 = v0.detach().cpu().numpy()
    v1 = v1.detach().cpu().numpy()

    def interpolation(t, v0, v1, DOT_THRESHOLD=0.9995):
        """helper function to spherically interpolate two arrays v1 v2"""
        dot = np.sum(v0 * v1 / (np.linalg.norm(v0) * np.linalg.norm(v1)))
        if np.abs(dot) > DOT_THRESHOLD:
            v2 = (1 - t) * v0 + t * v1
        else:
            theta_0 = np.arccos(dot)
            sin_theta_0 = np.sin(theta_0)
            theta_t = theta_0 * t
            sin_theta_t = np.sin(theta_t)
            s0 = np.sin(theta_0 - theta_t) / sin_theta_0
            s1 = sin_theta_t / sin_theta_0
            v2 = s0 * v0 + s1 * v1
        return v2

    t = np.linspace(t0, t1, num)

    v3 = torch.tensor(np.array([interpolation(t[i], v0, v1) for i in range(num)]))

    return v3
# The text prompt that describes the desired output image.
prompt = (
"Sci-fi digital painting of an alien landscape with otherworldly plants, strange creatures, and distant planets."
)
# A negative prompt that can be used to steer the generation away from certain features.
negative_prompt = "poorly drawn,cartoon, 3d, disfigured, bad art, deformed, poorly drawn, extra limbs, close up, b&w, weird colors, blurry"
# Generating initial latent vectors from a random normal distribution. In this example two latent vectors are generated, which will serve as start and end points for the interpolation.
# These vectors are shaped to fit the input requirements of the diffusion model's U-Net architecture.
latents = torch.randn(
(2, pipe.unet.config.in_channels, height // 8, width // 8),
generator=generator,
)
# Getting our latent embeddings
interpolated_latents = slerp(latents[0], latents[1], num_interpolation_steps)
# Generating images using the interpolated embeddings.
images = []
for latent_vector in tqdm(interpolated_latents):
images.append(
pipe(
prompt,
height=height,
width=width,
negative_prompt=negative_prompt,
num_images_per_prompt=1,
num_inference_steps=num_inference_steps,
guidance_scale=guidance_scale,
generator=generator,
latents=latent_vector[None, ...],
).images
)
# Display of saved generated images.
display_images(images, save_path)示例 3:多个提示词之间的插值
第一个示例从单一提示词出发改变嵌入;这里则支持在任意多个提示词之间过渡。取相邻提示词对,使用与示例 2 相同的 slerp 生成平滑过渡,再拼接这些相邻区间的插值结果,让模型据此生成图像。
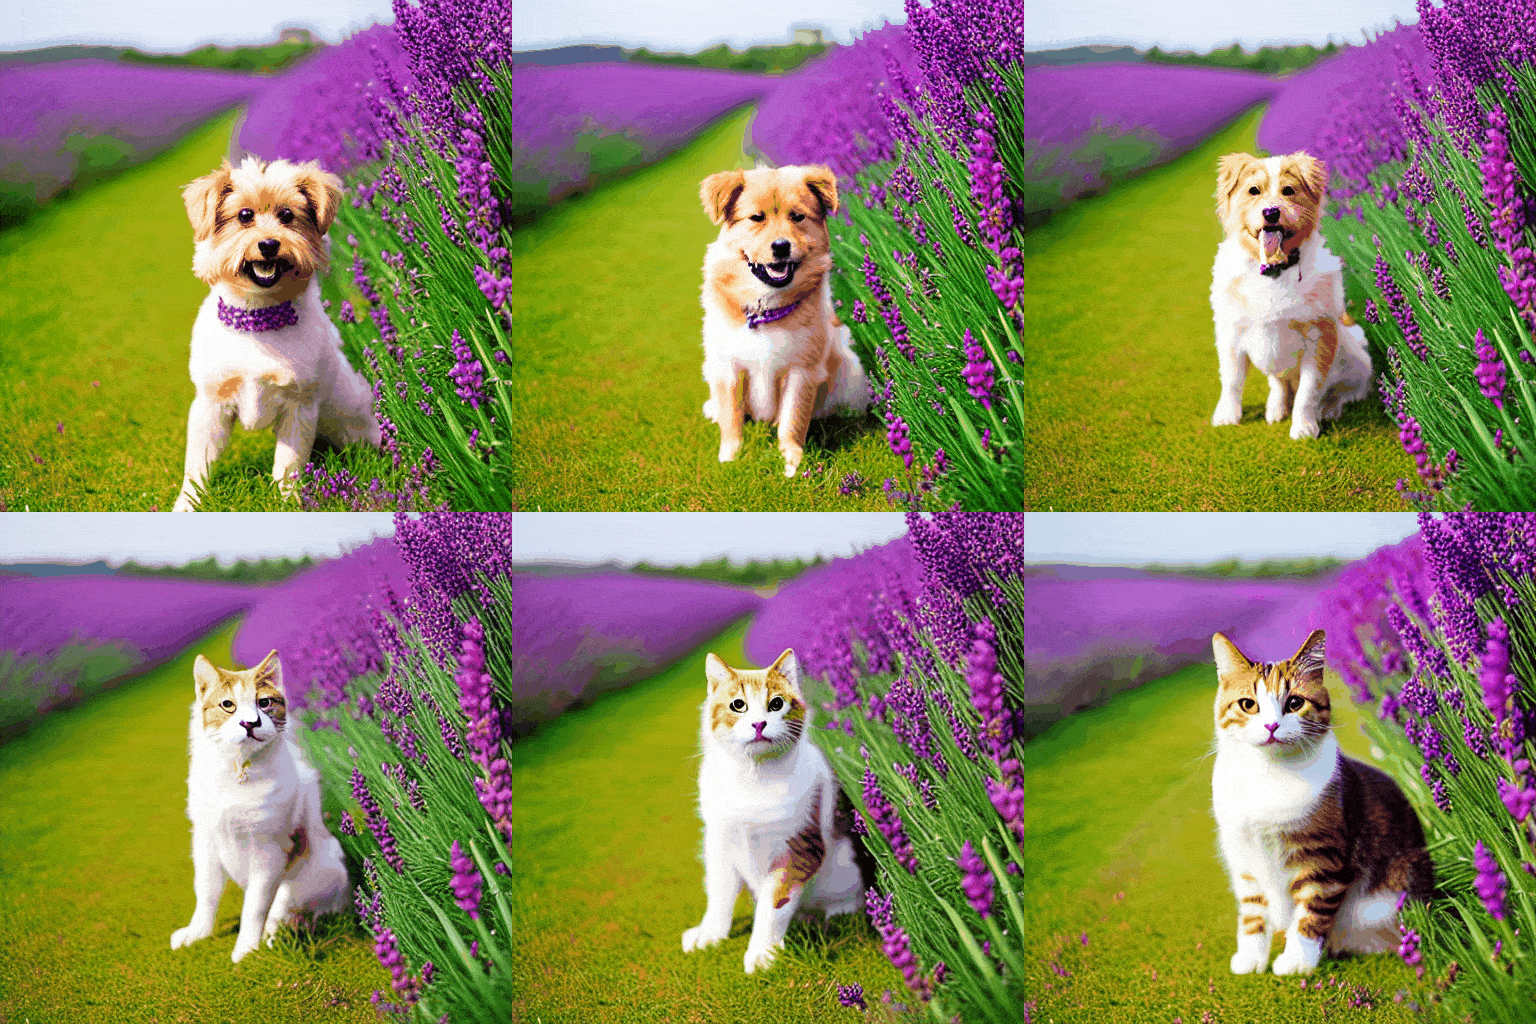
再次进行分词和编码,这一次处理多组正向与负向提示词:
# Text prompts that describes the desired output image.
prompts = [
    "A cute dog in a beautiful field of lavander colorful flowers everywhere, perfect lighting, leica summicron 35mm f2.0, kodak portra 400, film grain",
    "A cute cat in a beautiful field of lavander colorful flowers everywhere, perfect lighting, leica summicron 35mm f2.0, kodak portra 400, film grain",
]
# Negative prompts that can be used to steer the generation away from certain features.
negative_prompts = [
    "poorly drawn,cartoon, 2d, sketch, cartoon, drawing, anime, disfigured, bad art, deformed, poorly drawn, extra limbs, close up, b&w, weird colors, blurry",
    "poorly drawn,cartoon, 2d, sketch, cartoon, drawing, anime, disfigured, bad art, deformed, poorly drawn, extra limbs, close up, b&w, weird colors, blurry",
]

# NOTE: The number of prompts must match the number of negative prompts

batch_size = len(prompts)

# Tokenizing and encoding prompts into embeddings.
prompts_tokens = pipe.tokenizer(
    prompts,
    padding="max_length",
    max_length=pipe.tokenizer.model_max_length,
    truncation=True,
    return_tensors="pt",
)
prompts_embeds = pipe.text_encoder(prompts_tokens.input_ids.to(device))[0]

# Tokenizing and encoding negative prompts into embeddings.
if negative_prompts is None:
    negative_prompts = [""] * batch_size

negative_prompts_tokens = pipe.tokenizer(
    negative_prompts,
    padding="max_length",
    max_length=pipe.tokenizer.model_max_length,
    truncation=True,
    return_tensors="pt",
)
negative_prompts_embeds = pipe.text_encoder(negative_prompts_tokens.input_ids.to(device))[0]
如前所述,依次取相邻的提示词对,用 slerp 生成平滑过渡:
# Generating initial U-Net latent vectors from a random normal distribution.
latents = torch.randn(
    (1, pipe.unet.config.in_channels, height // 8, width // 8),
    generator=generator,
)

# Interpolating between embeddings pairs for the given number of interpolation steps.
interpolated_prompt_embeds = []
interpolated_negative_prompts_embeds = []
for i in range(batch_size - 1):
    interpolated_prompt_embeds.append(slerp(prompts_embeds[i], prompts_embeds[i + 1], num_interpolation_steps))
    interpolated_negative_prompts_embeds.append(
        slerp(
            negative_prompts_embeds[i],
            negative_prompts_embeds[i + 1],
            num_interpolation_steps,
        )
    )

interpolated_prompt_embeds = torch.cat(interpolated_prompt_embeds, dim=0).to(device)

interpolated_negative_prompts_embeds = torch.cat(interpolated_negative_prompts_embeds, dim=0).to(device)
最后根据这些嵌入生成图像:
# Generating images using the interpolated embeddings.
images = []
for prompt_embeds, negative_prompt_embeds in tqdm(
    zip(interpolated_prompt_embeds, interpolated_negative_prompts_embeds),
    total=len(interpolated_prompt_embeds),
):
    images.append(
        pipe(
            height=height,
            width=width,
            num_images_per_prompt=1,
            prompt_embeds=prompt_embeds[None, ...],
            negative_prompt_embeds=negative_prompt_embeds[None, ...],
            num_inference_steps=num_inference_steps,
            guidance_scale=guidance_scale,
            generator=generator,
            latents=latents,
        ).images
    )

# Display of saved generated images.
display_images(images, save_path)
示例 4:单个提示词下沿扩散潜空间环形漫步
本示例参考 Keras 的“Random walks with Stable Diffusion”教程,链接见原文相关链接。
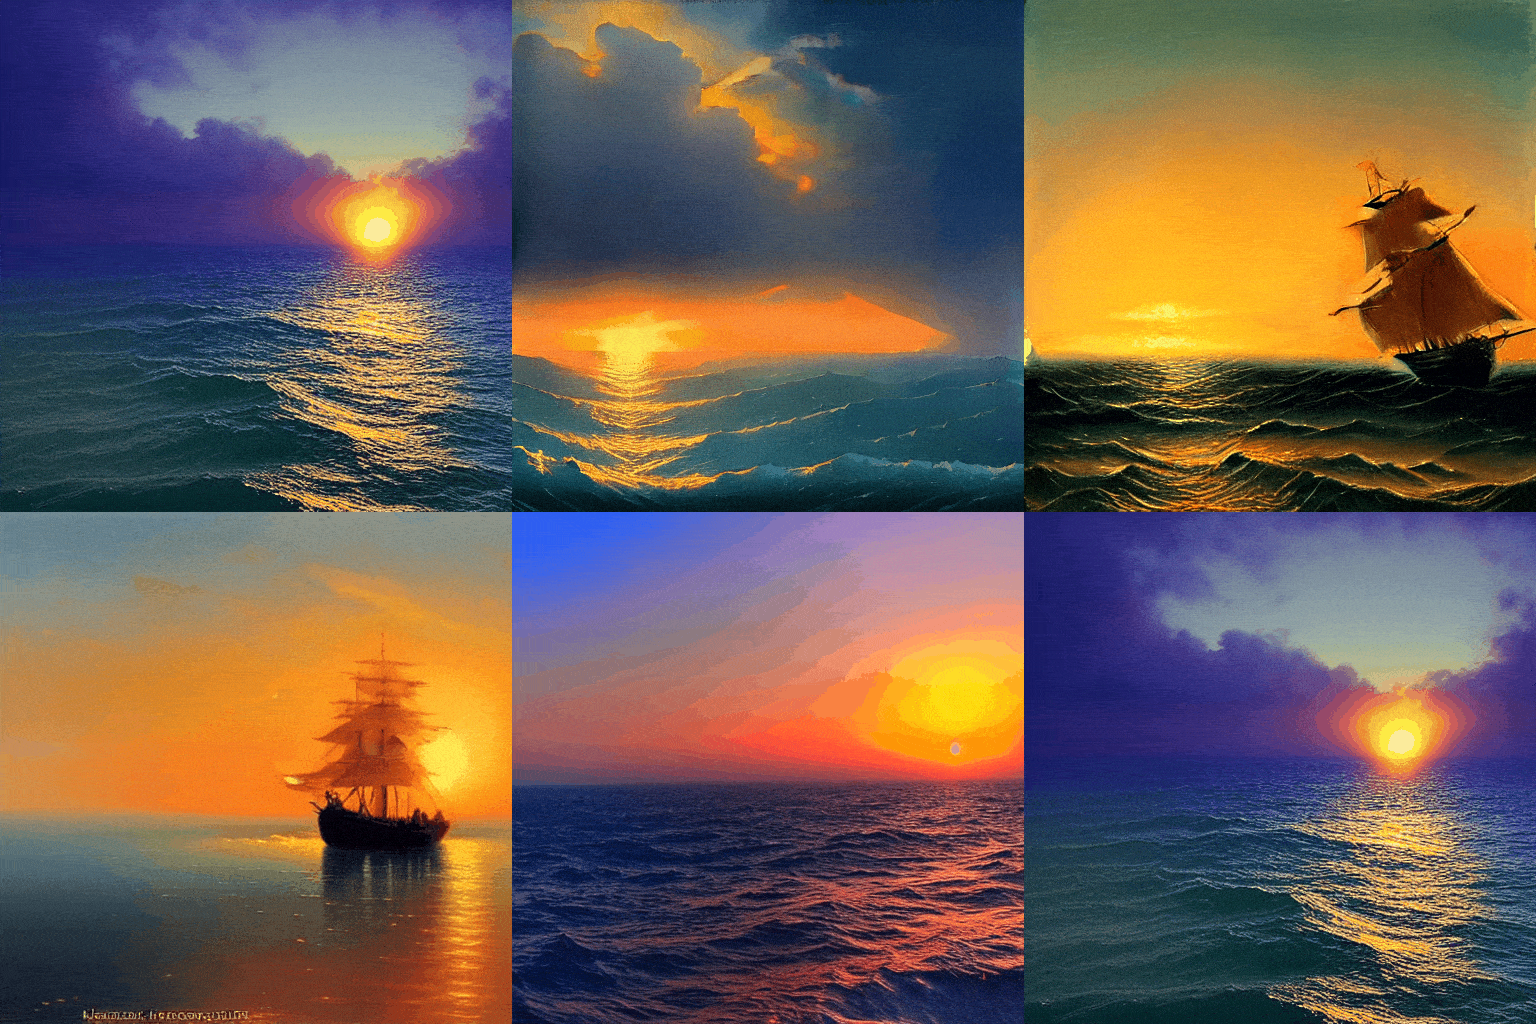
设有两个噪声分量 和 。令角度从 0 变化到 ,在每一步用余弦和正弦分别缩放这两个分量,再将结果相加。走到终点时,噪声回到起始值,因此生成过程形成闭环。
# The text prompt that describes the desired output image.
prompt = "Beautiful sea sunset, warm light, Aivazovsky style"
# A negative prompt that can be used to steer the generation away from certain features
negative_prompt = "picture frames"

# Generating initial latent vectors from a random normal distribution to create a loop interpolation between them.
latents = torch.randn(
    (2, 1, pipe.unet.config.in_channels, height // 8, width // 8),
    generator=generator,
)


# Calculation of looped embeddings
walk_noise_x = latents[0].to(device)
walk_noise_y = latents[1].to(device)

# Walking on a trigonometric circle
walk_scale_x = torch.cos(torch.linspace(0, 2, num_interpolation_steps) * np.pi).to(device)
walk_scale_y = torch.sin(torch.linspace(0, 2, num_interpolation_steps) * np.pi).to(device)

# Applying interpolation to noise
noise_x = torch.tensordot(walk_scale_x, walk_noise_x, dims=0)
noise_y = torch.tensordot(walk_scale_y, walk_noise_y, dims=0)

circular_latents = noise_x + noise_y

# Generating images using the interpolated embeddings.
images = []
for latent_vector in tqdm(circular_latents):
    images.append(
        pipe(
            prompt,
            height=height,
            width=width,
            negative_prompt=negative_prompt,
            num_images_per_prompt=1,
            num_inference_steps=num_inference_steps,
            guidance_scale=guidance_scale,
            generator=generator,
            latents=latent_vector,
        ).images
    )

# Display of saved generated images.
display_images(images, save_path)
后续探索
可以继续调整引导强度、随机种子和插值步数,观察它们对图像的影响;也可以尝试不同提示词和调度器。还可以用线性插值替代球面线性插值,并比较结果,以更深入地理解插值过程。











暂无评论内容